

Cover
The tall vertical box on the left is the cover slot. Click it to pick a file, or drag an image onto it. The instruction reads “Upload a JPG, PNG, or GIF (up to 5MB)”, and WebP is accepted too. Hover over it and a trash can appears at the top right. This image becomes the book cover on the Home screen. A color pulled from the cover is darkened and used for the spine, so changing the image changes the spine color along with it. Leave it empty and the project name is set in serif type on a cloth-bound cover.Name, description, and tags
The three fields on the right have no save button. They upload on their own a moment after you stop typing, and a small indicator spins at the right of the field while they do. Work Name takes up to 500 characters and Description up to 5,000. The description shows as one line under the project name in the Home list view, and up to two lines when you hover over the book cover. For Tags, click the field, type a word, then choose the item that appears below to attach it. The tags gathered here come back as candidates when you tag a part card on a plotboard. Decide the words for the project in advance and you do not have to type them again on every card.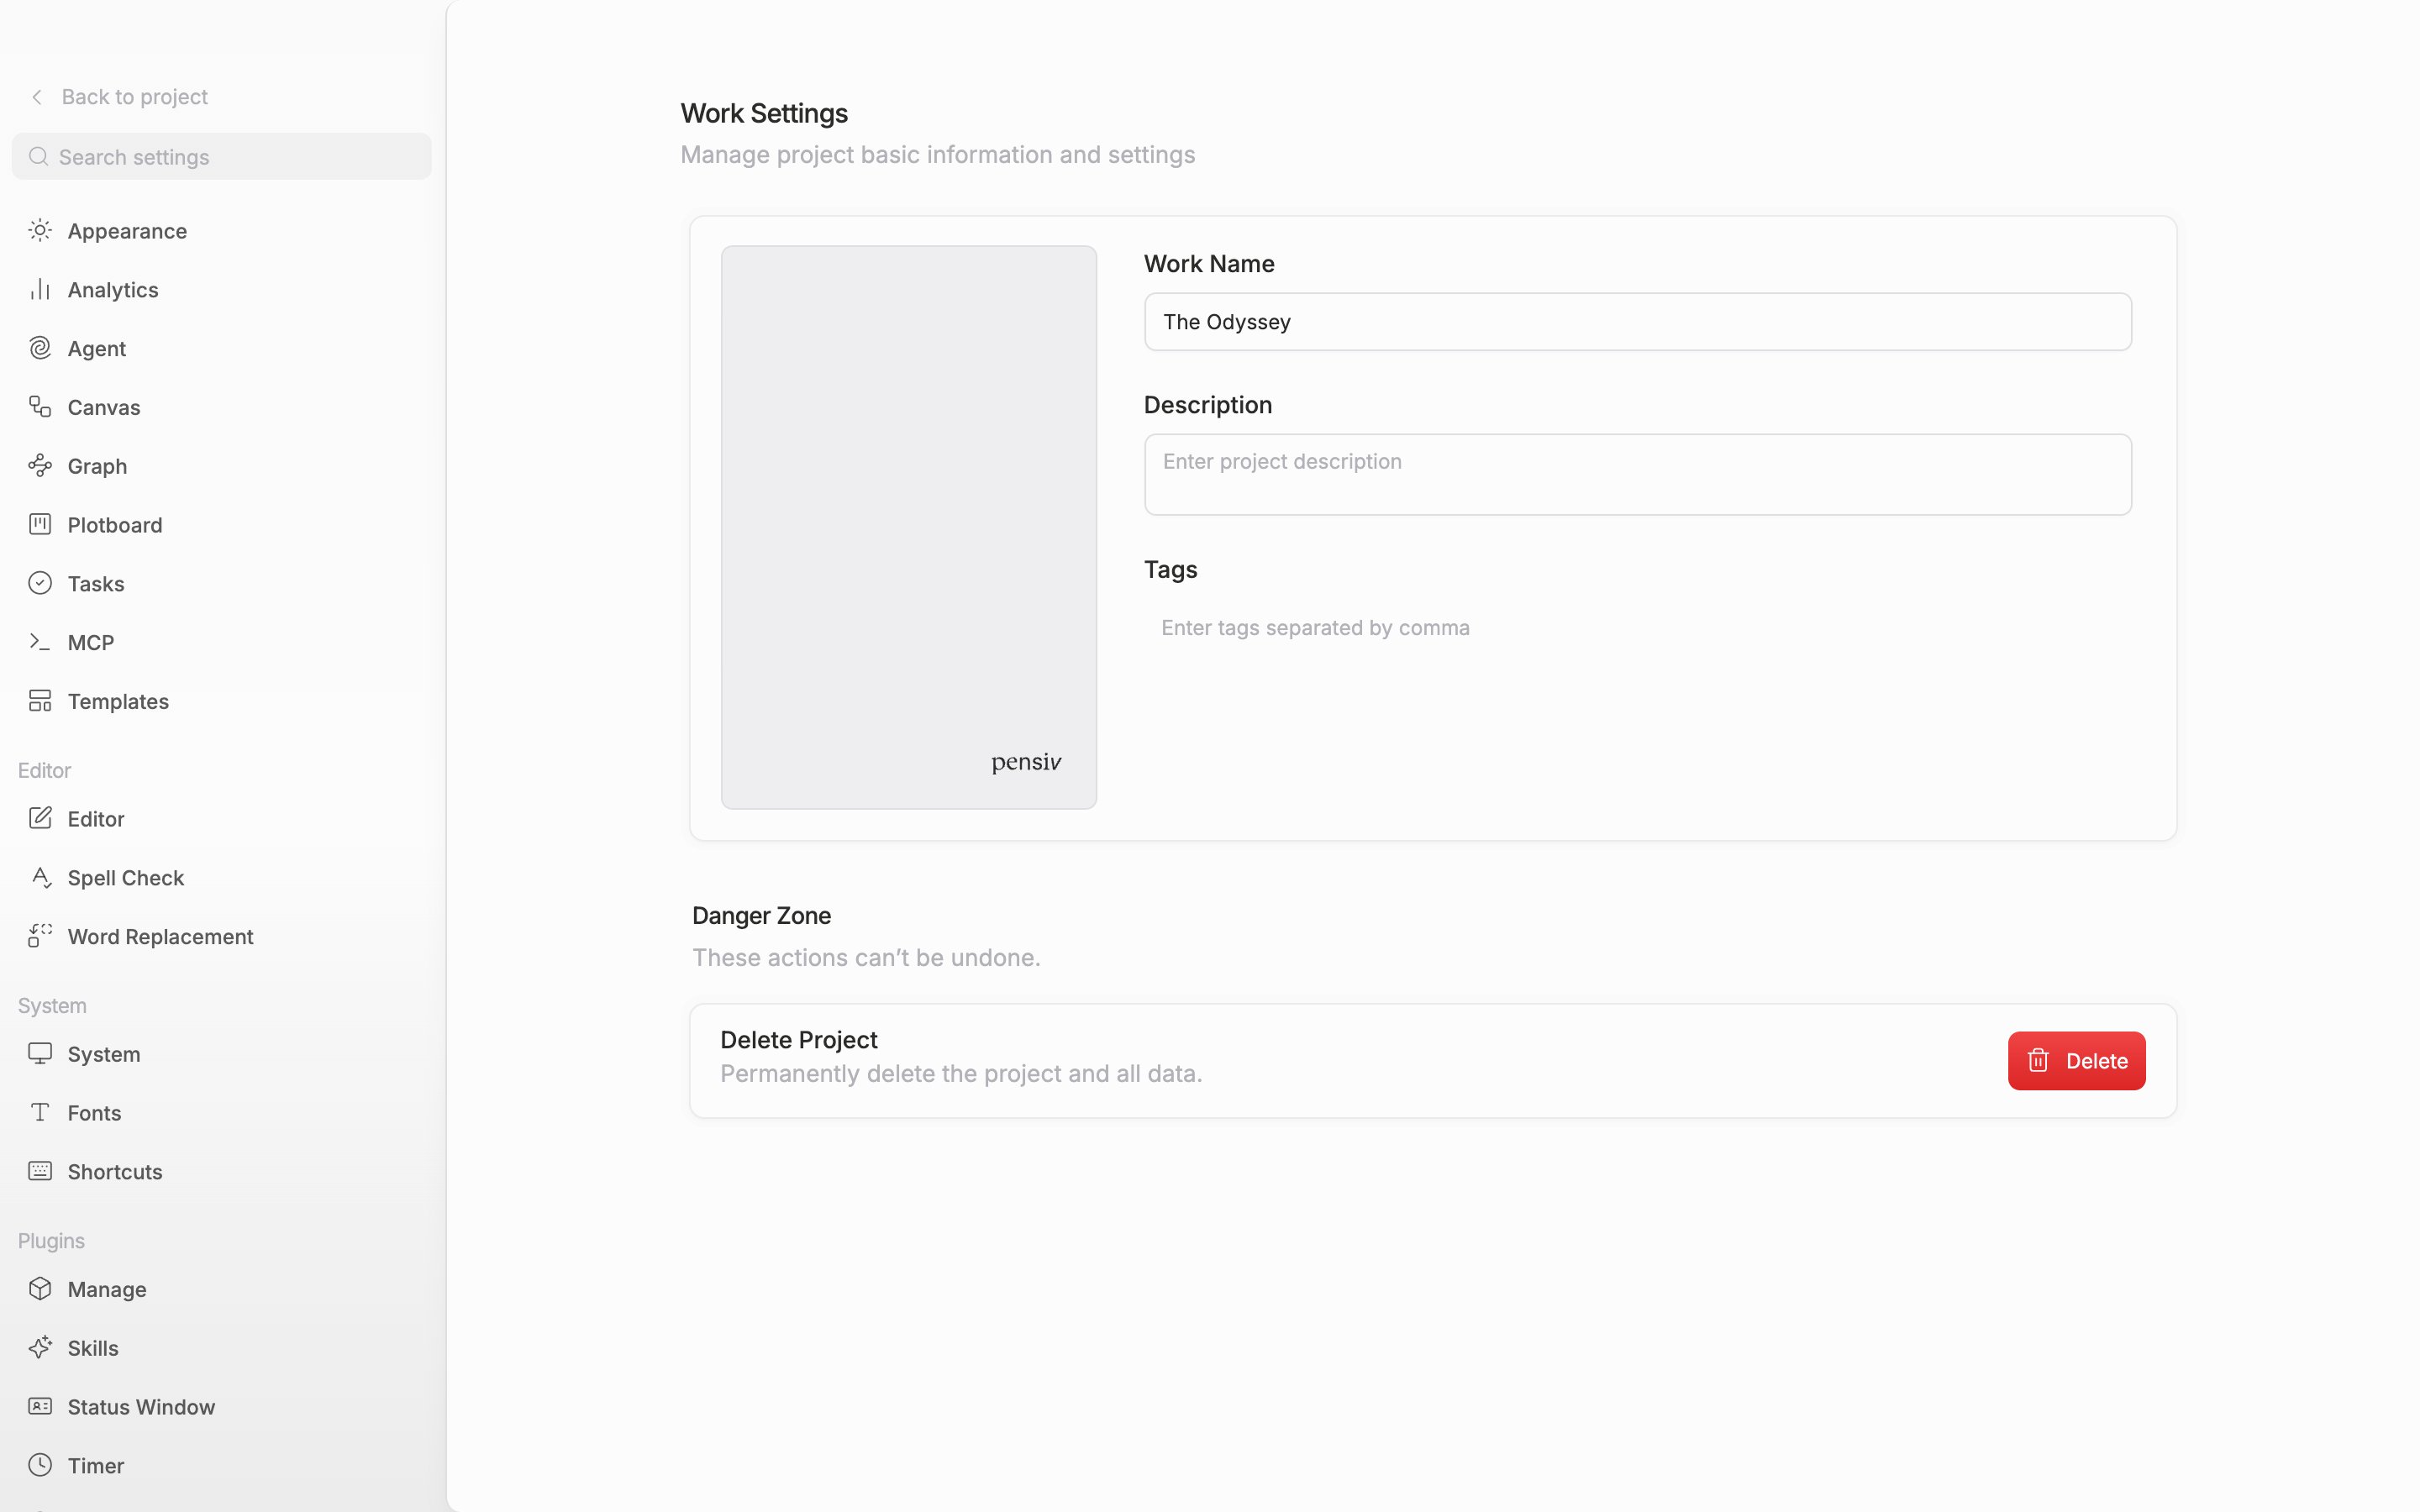
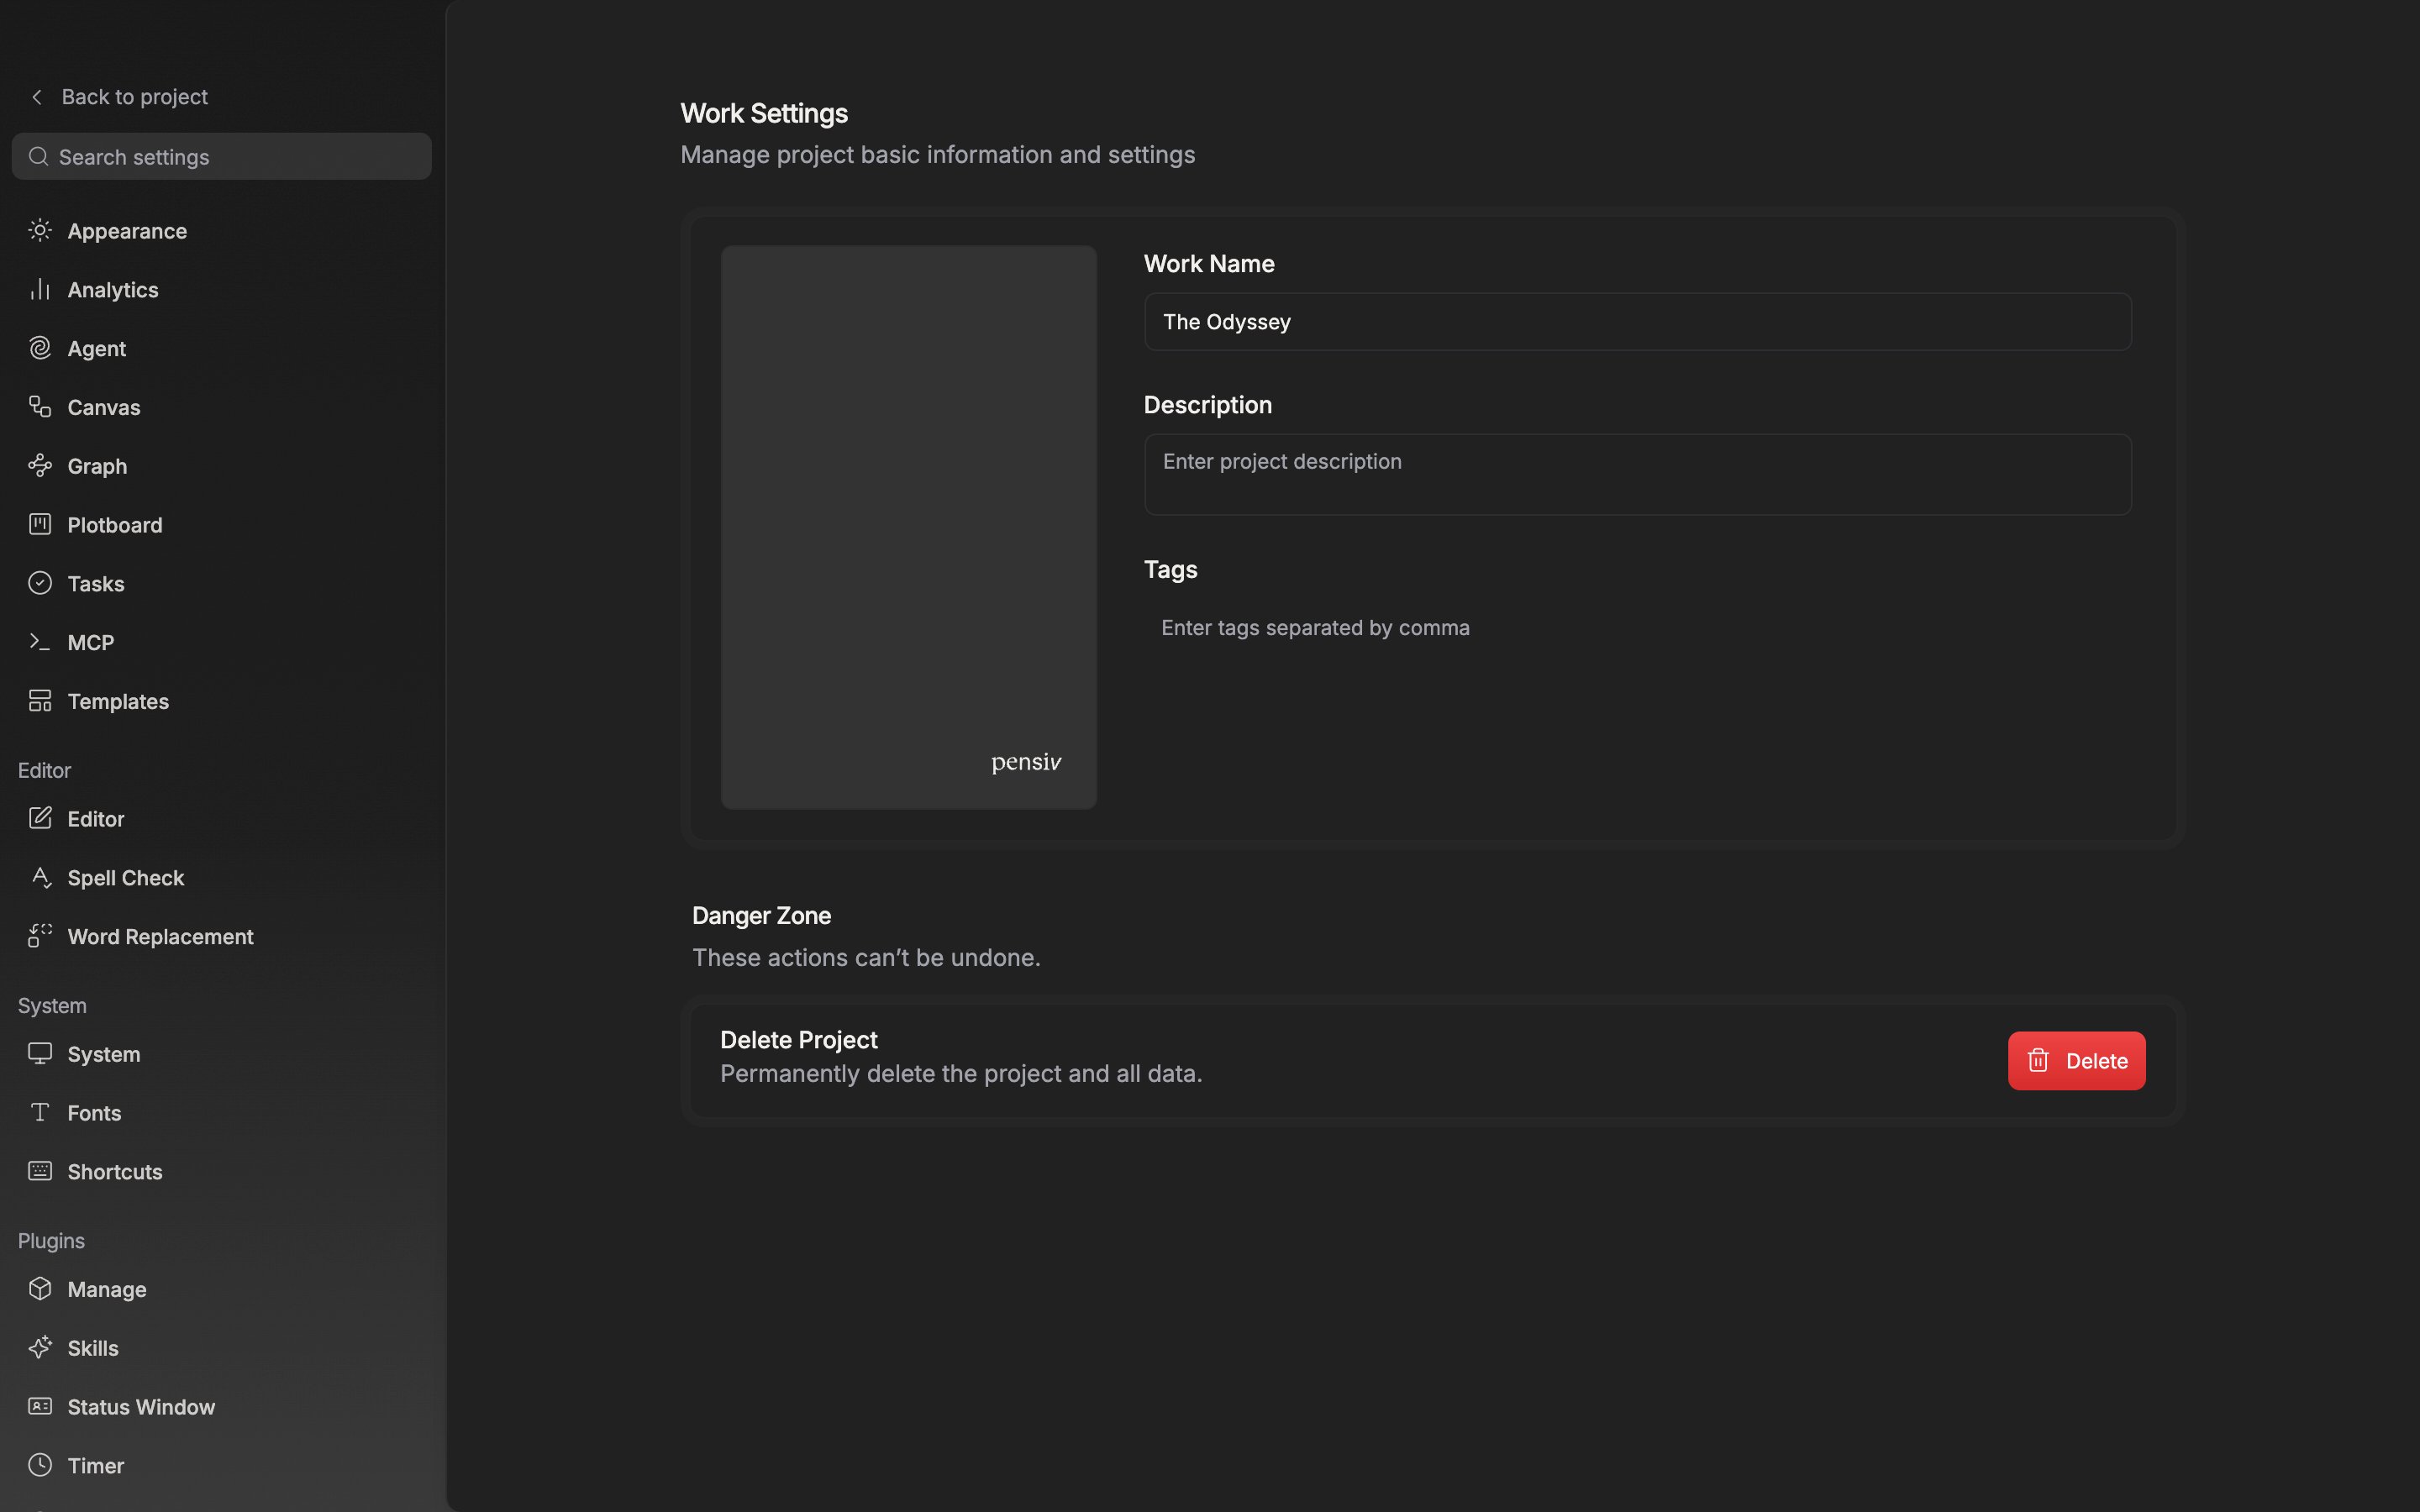
The cover and the basic information sit in one card, and changes take effect immediately without a save button.
Danger Zone
The Danger Zone at the bottom has a Delete Project row. Click Delete and a confirmation dialog opens, where two things have to be filled in before the delete button comes alive.- Type the project name letter for letter into the Type project name field.
- Check I understand this action cannot be reversed.
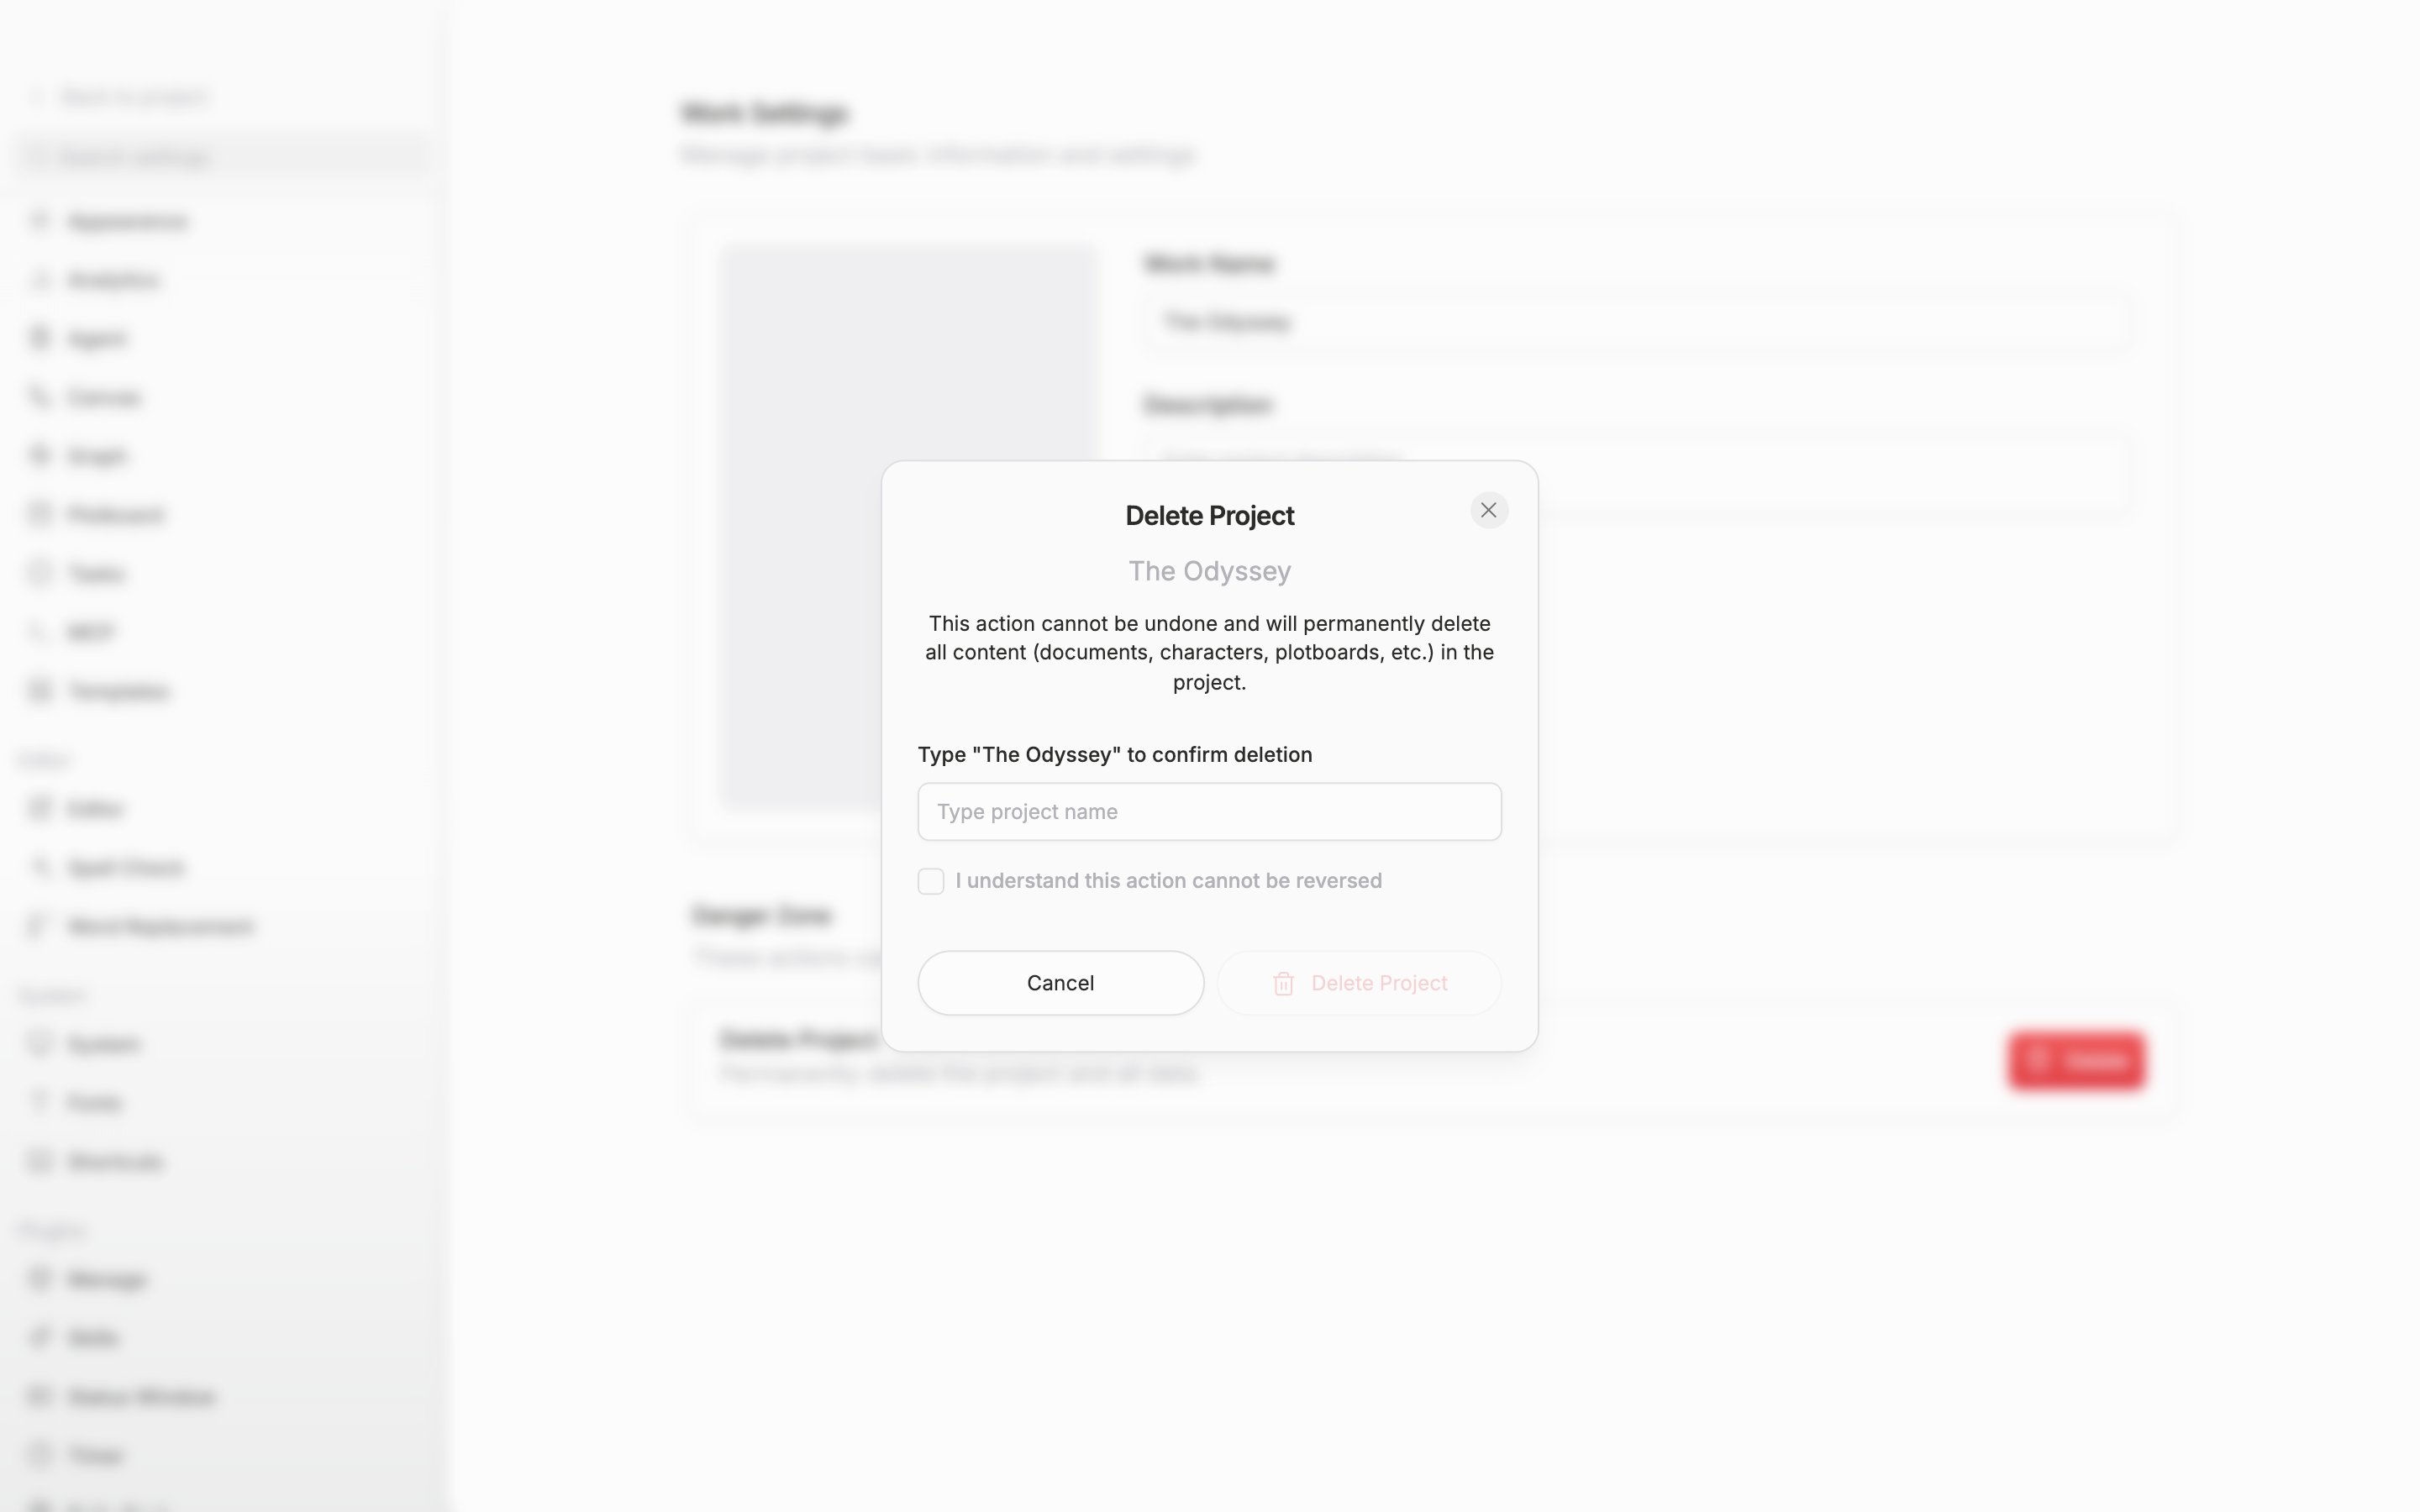
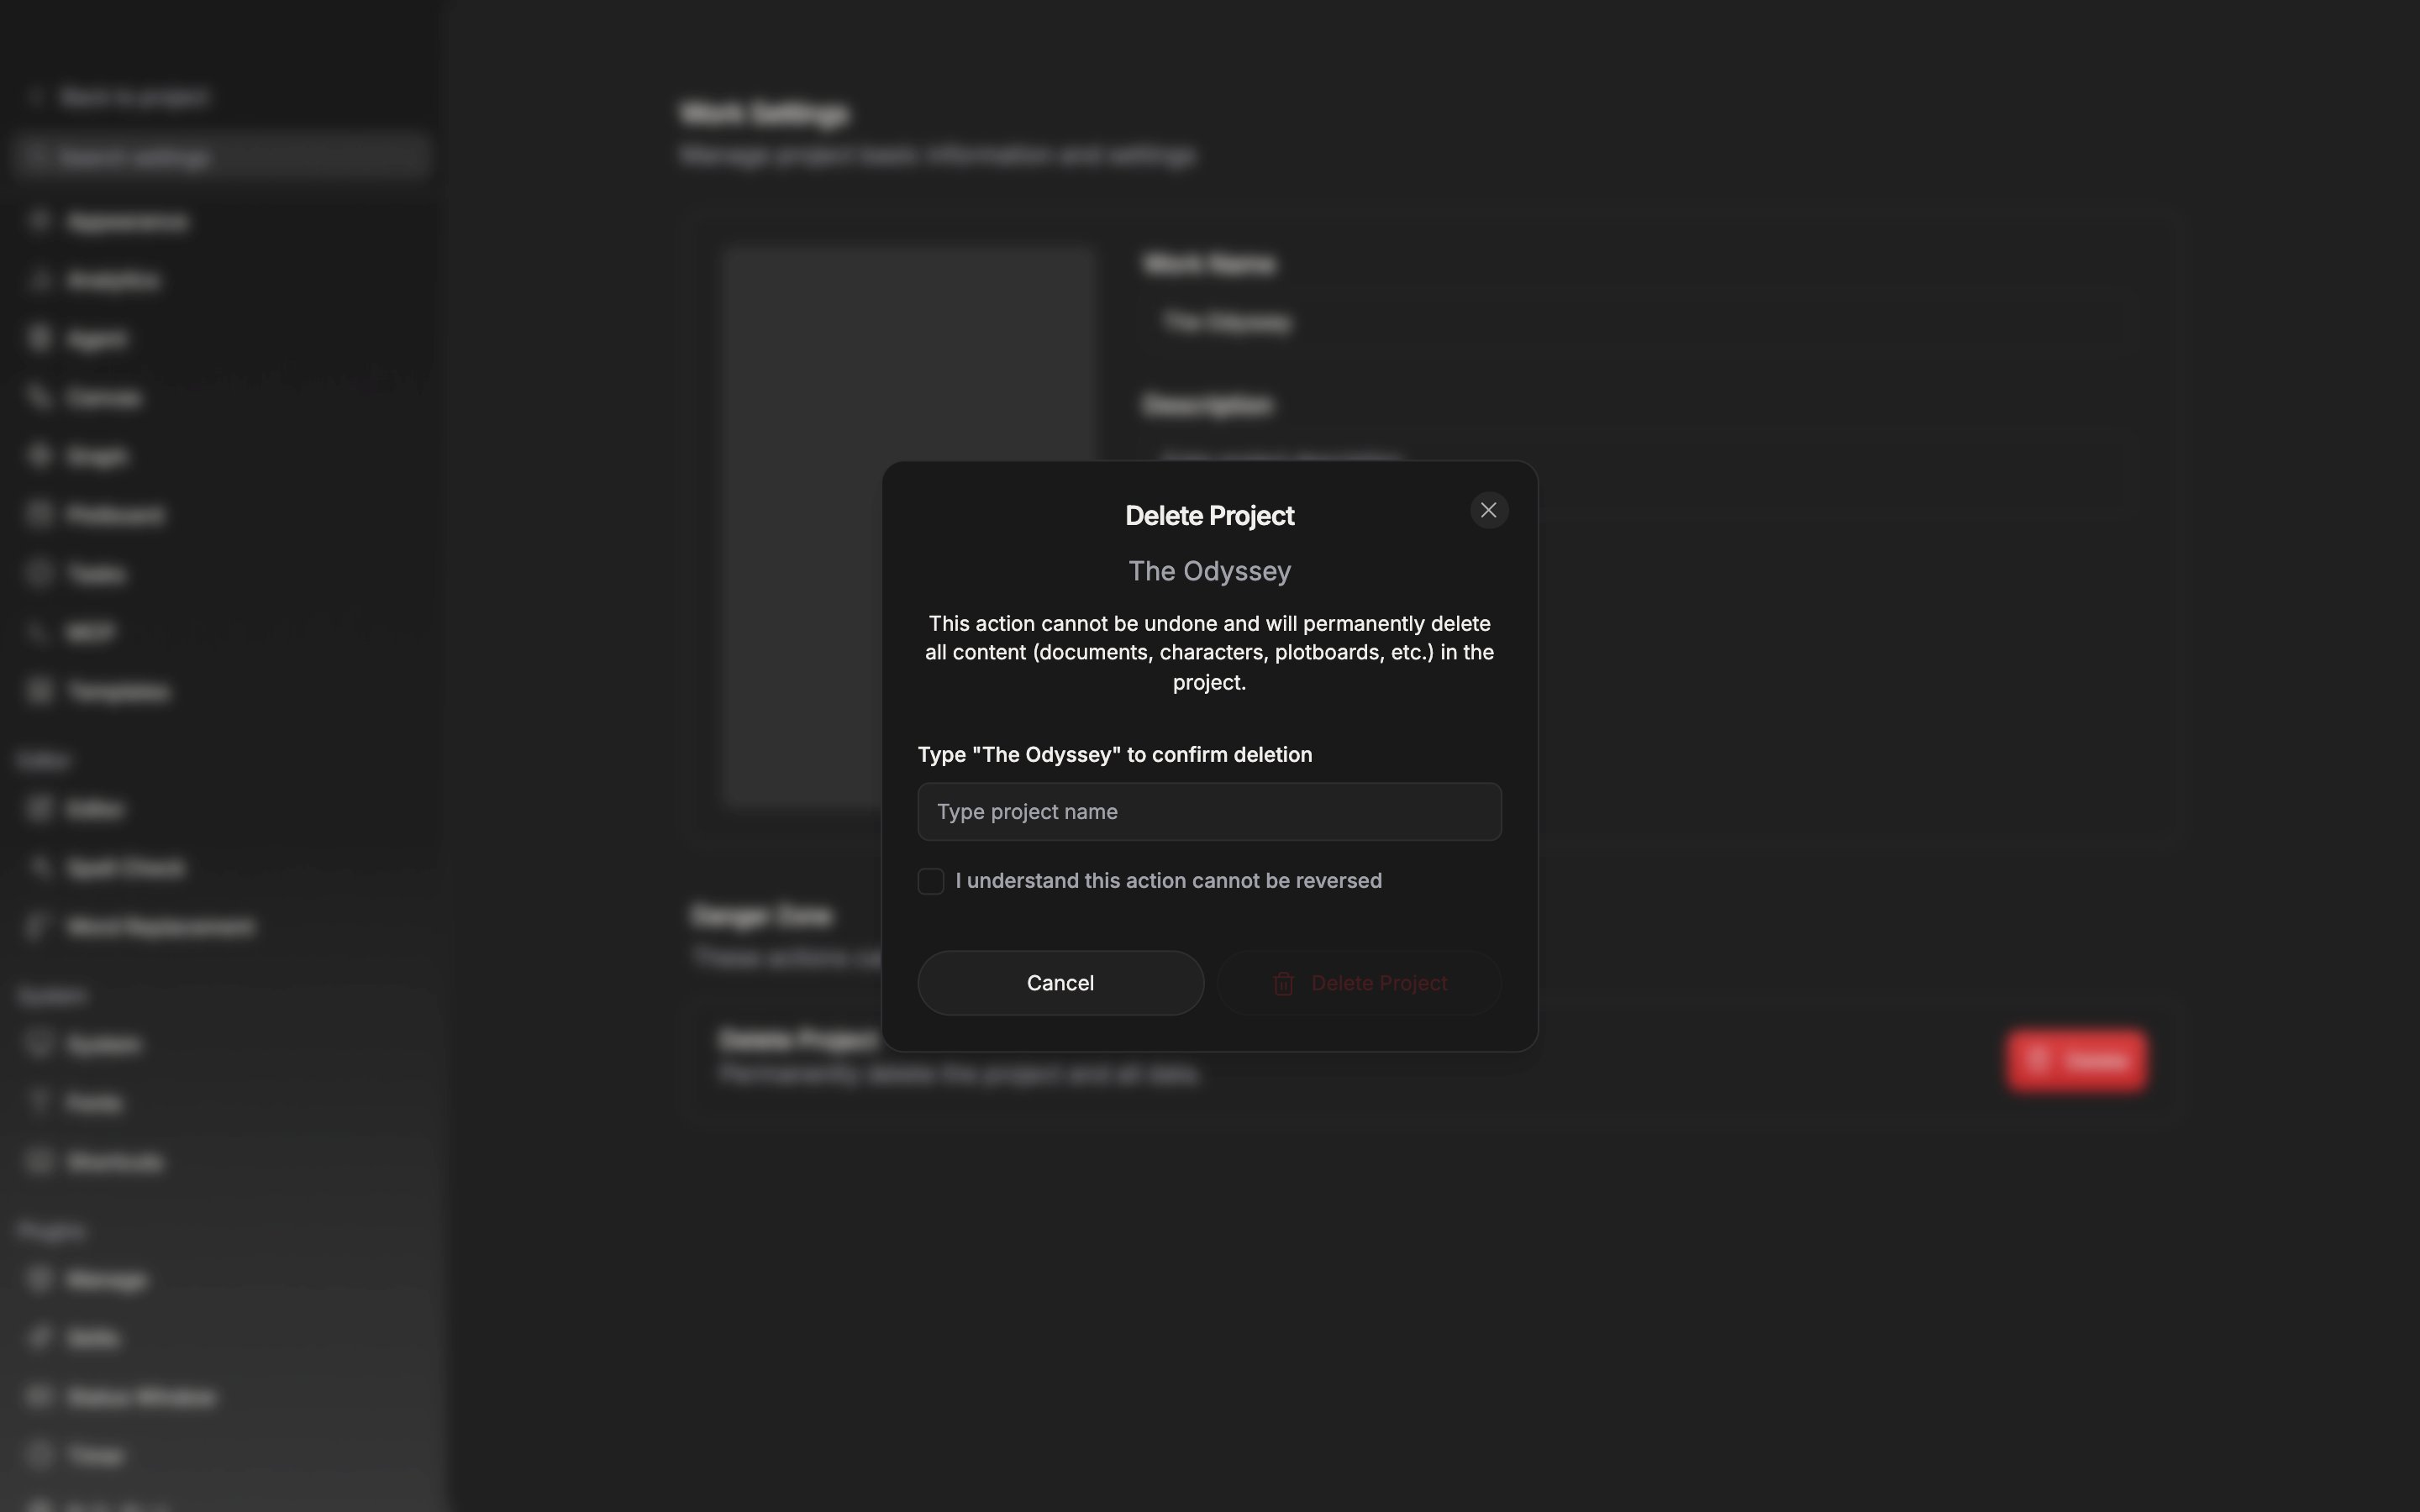
The delete button opens only after you type the name exactly and check the box.